Sunday, December 4, 2011

Christmas Stockings and Table Runners

Finished up the rest of my Christmas projects!  Here is my table runner, and stockings!


Christmas Stockings Project # 3


The initials are wood letters that I painted and hot glued some buttons and extra rick rack to.


 I'm so so happy to get rid of the cheap stockings from Walmart that I bought us to use years ago. 
Old Stocking


Table Runner Project # 4


I originally bought this to make place cloths and then thought better of it.  Mainly because you can never run out of a table runner but you could possibly not have enough place mats for everybody.


Saturday, November 26, 2011

Table Top Christmas Topiary

Christmas is quickly approaching, so like many others the day after Thanksgiving I pulled out the tree and decorations.  I then realized that the decorations that worked great in our duplex were not going to work so well in our new place.  I found lots of cute things I wanted like new stockings, hangers for the stockings, and table top decorations for our dining room table. After looking at the prices for all the things I wanted to get, I realized if anyone wanted Christmas presents I better figure out a way to make them. I ran out to Joann's to get my supplies (got great deals since I went the Saturday after Thanksgiving!) and this is what I came up with.


Project number 1 - Table Top Christmas Topiary


As much as I'd love the take the credit for this idea I can't.  I saw it on TipJunkie.  I made a few minor changes, such as I wasn't about to use glass ball ornaments around my house with the children running around.  I probably would have been broken faster than it took me to make it. 


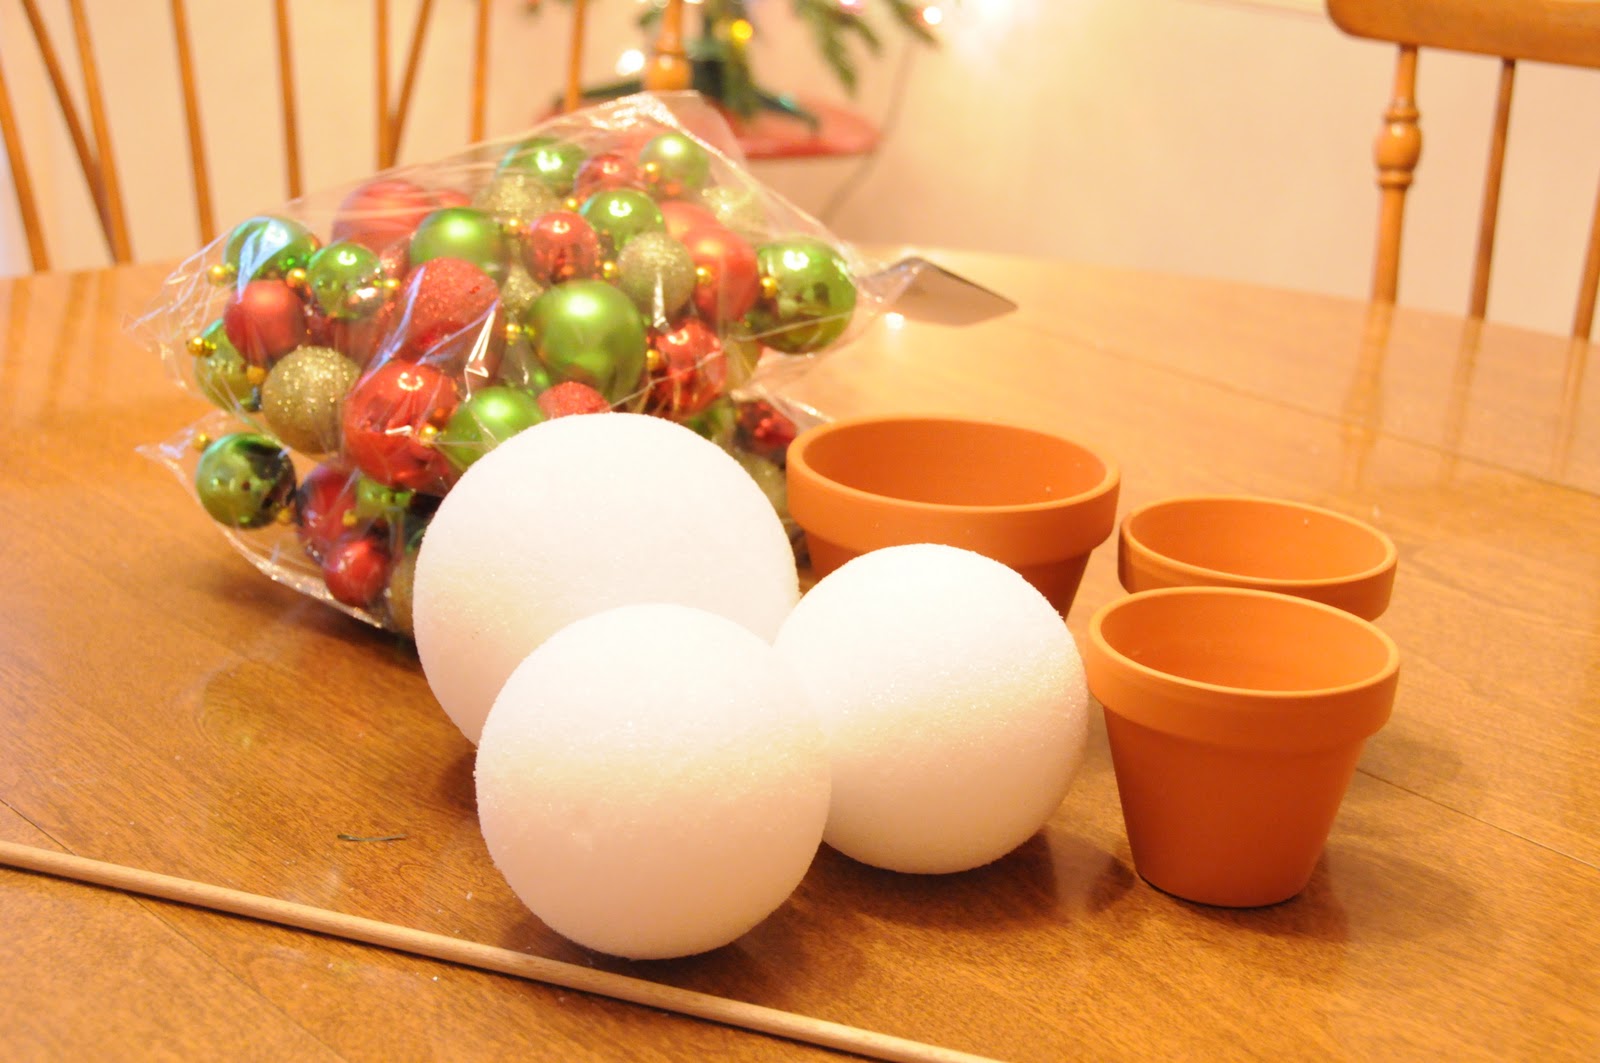
I bought one 4 inch and two 3 inch pots, a 5 inch and two 4 inch foam balls, dowel  rod, and two packages of garland. 
 
Paint your pots,  I choose green and red. 
Finished!


I then covered the foam balls with left over fabric I had from a dress I made.  I used a low temp hot glue gun to get the fabric to stick.

Covered and ready to go!

I couldn't find any plastic ornaments, but I did find this great garland and bonus it was much cheaper than buying ornaments. 

I was hoping to make 3 of these but I miscalculated exactly how much I would need to cover one of the foam balls. It worked out though, I need one of the balls to put in to the flower pot so the topiary would stand up. 


This is the finished product.  Even though it didn't turn out how I planned I think it looks pretty good.  And I was still able to use the smaller flower pot and left over beads from the garland. =)

Project number 2 for the day!
Stocking Hangers.  I was looking for stocking hangers and really was thinking I was going to get the heavy kind that sit on top of the mantel.  Then I started thinking of kids pulling on the stocking and trips to the ER after they get hit in the head by basiclly a paper weight with a hook attached.  Well that wouldn't do.  So in all my online searching I found these.
 Sock Hook Stocking Hanger - RED - Improvements
Then I saw the price and figured somebody has had to figure out a way to make these at home.  So I found The Many Faces of Mom's Blog   
So now for less and a buck each I have 8 stocking hangers.  They are so easy to make I decided to make them for when the extended family come we can hang their stockings also.


Now I just need to get the stockings made!

Saturday, March 19, 2011

Tank Top Dress


I got inspired after seeing a dress at Gymboree and just had to make on like it.  I got the dress made and then as I kept looking at it I decided it was missing something.  Ah just the thing! Flowers around the neck using the left over t-shirt material.  See how boring the dress looked before.  ------>


 Using the bottom of the shirt I cut 1 inch strips. Used a gathering stich and then pulled to gather the fabric.


I rolled the fabric around, see already looking like a flower.
This is what it looks like from the back

Then sew together on the bottom 
I sewed it on tight.


I made one big flower and then 3 smaller ones for the sides.

This is a very easy dress to make.  I bought a tank top and 1 1/2 yards of fabric for the skirt.  Basically you hem the top of the skirt and then gather it and leave it on the outside.  I can't wait to make another one.

Wednesday, March 16, 2011

Homemade Freezer Jam!

The sugar and strawberries went on sale this week at my Price Chopper.  That meant one thing, time to make strawberry jam!  I stumbled across a recipe for freezer jam about one year ago and decided to give it a try.  At that point I was sick of spending so much money on jam at the grocery store.  Now I know you can get it pretty cheap but I try to steer clear of food that has large amounts of high fructose corn syrup in it.  So the result was I was spending $3 on one little jar of jam that only has a little over a cup in it.  For the price of $7 I can make 12 cups of strawberry jam.  Throw in another $5 if you need to buy containers. Way cheaper than buying it at the store.  I use the recipe on the sure jell box. It works great every time. 


Gather all the ingredients.  You need 4 lbs of sugar, 2 containers of stawberries, I always buy one extra. Two packages of Sure Jell, a chopper, and containers.  I like the small twist and store plastic ones. They hold 2 cups each.


Wash your fruit

Cut off the tops of the strawberries

Chop up the strawberries.  Don't chop up to much you want bits of fruit in the jam.

Chop up enough to get 4 cups.  The recipe only calls for 2 cups but I double it.  We eat it and it can stay in the freezer for a long time.

add 1 1/2 cups of water and 2 packages of Sure Jell in to a 3 quart sauce pan.  Turn on high.

Measure out 8 cups of sugar.  It takes almost the whole 4 lb bag.

Add chopped strawberries to sugar

and mix well.

While the strawberries are sitting soaking up the sugar goodness.  Stir Sure Jell and  bring to a boil.

Stir for one min after it comes to a boil and then take off heat.  Don't let it burn! 

Add strawberries

mix well.  Turn the heat on to medium, stir until all of the sugar is dissolved.  The recipe on the box doesn't tell you to do this but it turns out much better if you do.  =)

Measure out 2 cups in each container.

Its so good Molly loves to lick the spoons after I'm finished.

Put lids on and let sit over night.  Once the jam is like jello when you shake it lightly back and forth it is ready to go in the freezer.

Friday, March 4, 2011

Birthday Shirt

My new love is shirts with the kids ages on them.  I made this one for Molly using a shirt from Hobby Lobby left over fabric from a pair of shorts I'm in the process making for Molly and my old jeans.  Oh plus some buttons I had laying around.

Before I cut up the jeans I drew what I wanted the number to look like for a pattern


 Next I cut out some of the flowers from the left over fabric.  And placed them where I thought they looked nice.


The best thing I found at the fabric store is called heat and bond.  It sticks to whatever you want to sew on and then the paper peels off to stick to whatever you are sewing it to. 


Trace around the shape and then cut out.


 Iron head and bond paper on to the back  and peel off the paper.


I ironed the flowers down that I wanted behind the four first so I could stitch around them.  I use a zig zag stitch length set at 0.3 and the width at 4.0


End result, One happy birthday girl!